Kennisbank
Klantensysteem Home > Kennisbank > Ascend Servers > Game Servers > Specific Game Servers > 7 Days to Die > Settings yourself as Admin in 7 Days to Die
Settings yourself as Admin in 7 Days to Die


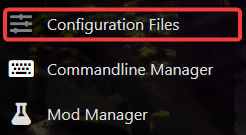
Navigate the file "serveradmincustom.xml" then click the "Text Editor"

The line you will see is as follows:
<adminTools>
<admins>
<!-- <admin steamID="76561198081237071" permission_level="0" /> -->
</admins>
You need to remove <!-- and --> as this comments out this line,
The next step is to obtain your Steam profile ID. To do so, refer to the following instructions:
STEAM ID INSTRUCTIONS:
http://steamid.co/
Instructions:
Enter the name of the player in the search bar. example: NameTest
You can also use the URL of their Steam page if the name doesn't work.
Using in-game commands, you can also add or delete moderators, admins, whitelists, and blacklists.
You will want the STEAM64ID. example: 76561198021925107
Then, change the id: 76561198081237071 to your Steam 64ID e.g. 7121212121212
It should now look like:
<admin steamID="7121212121212" permission_level="0" />
Click Save, and Start your server, you should now be admin.
If you encounter any issues please click here to reach out to our support team via a ticket for further assistance.
7 days to die, 7 Days To Die Setting Yourself As Admin, Reinstall 7 days to die server, reinstall
